
The Art of Blending
Ready to Start Creating Masterpieces?
Transform Your Photos From Ordinary To Amazing With The Power Of Blend Modes—It’s Easy And Fun, And Will Make Your Family And Friends Say “WOW!”
Whether you’ve just dabbled with blend modes or you feel pretty comfortable using them, I invite you to step up to a new level of blending where you create powerful imagery and art from your photos.
Go ahead—take a seat in my digital studio and make yourself comfortable. Watch as I demonstrate new ways to use blend modes. I’ll share my favorite texture and blending overlays with you and teach you my personal techniques and shortcuts.
When it’s your turn to try your hand at blending, you’ll already know what to do and how to do it, but if you still have questions, you can contact me personally.
And when you post your photos in the gallery, guess which picture will jump out and grab the attention of viewers?
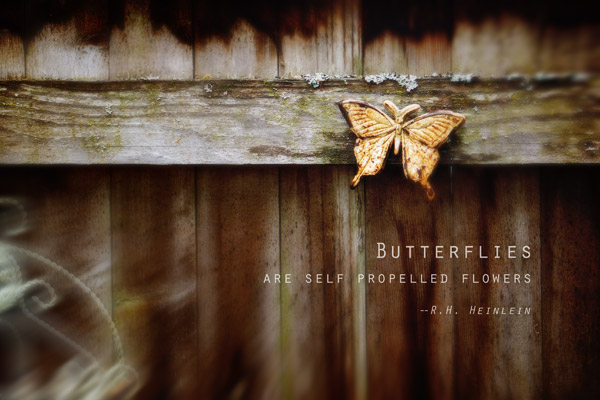
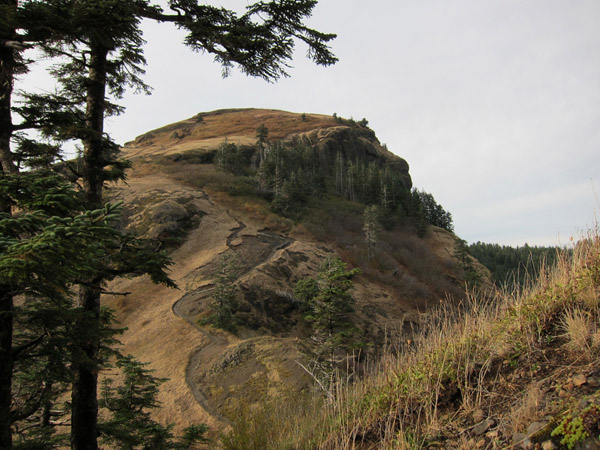
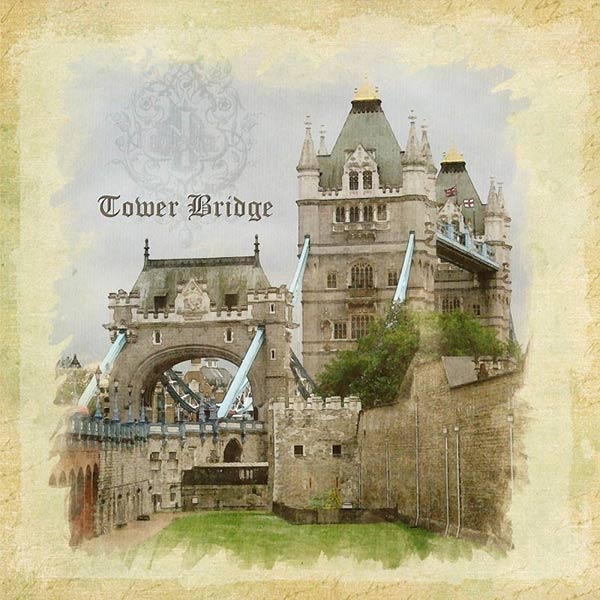
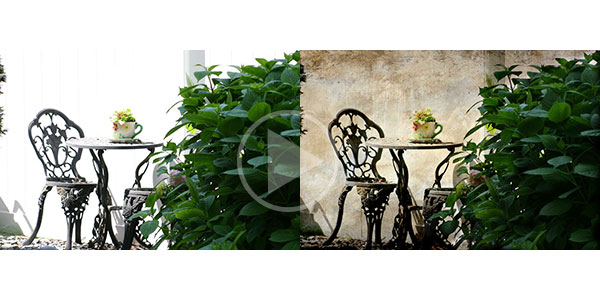
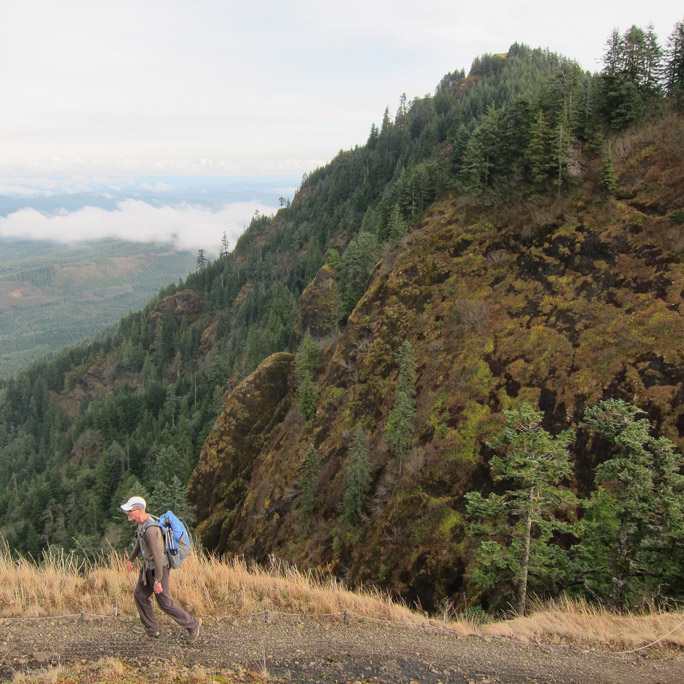
Before
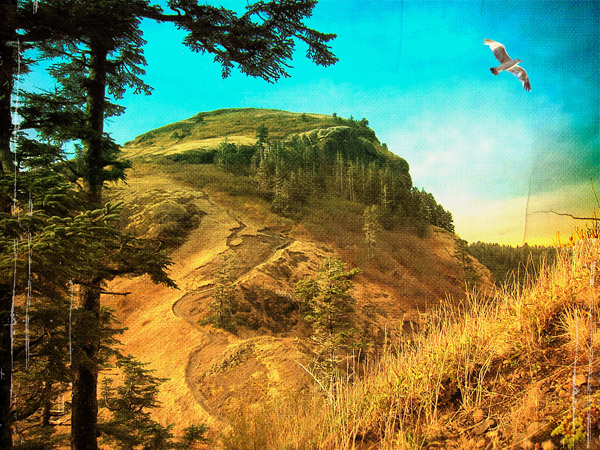
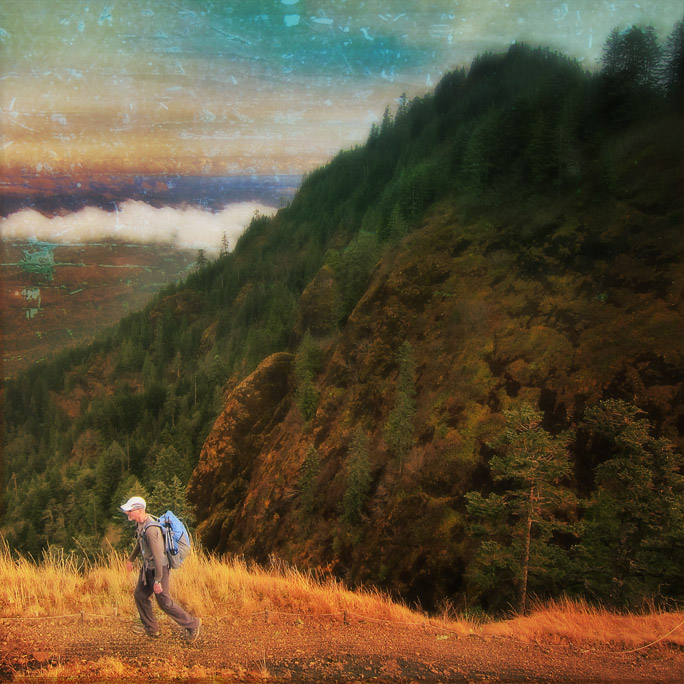
After
Members Of This Class Have Said:
Sarah Schantz
Breinigsville, PA
My pages have gone to a whole new level. As a scrapper with absolutely no artistic training, this class was a must. Thank you so much.
Jo Campbell
Flatonia, TX
Before
After

Here’s What You’ll Learn In Class
Module 1: Infuse Your Photos With Emotional Power
Great blending starts with great photos that make an emotional connection with the viewer. I’ll show you ways to get that emotional power in the first section of the class. We’ll cover what to look for before pressing the shutter button, as well as after-the-fact power techniques that are easy to add in Photoshop or Photoshop Elements.
(By the way, this works with point-and-shoot cameras, as well as the expensive DSLR types.)
You’ll come away from the first week of class with a fistful of tried-and-true “recipes” for powerful photos and a stash of my favorite go-to textures to blend with your new-and-improved photos.
Module 2: The Magic Of Blending With White
Who knew blending photos with a white background could be so fun and versatile?
You’ll learn a simple method to set up a photo shoot and create a series of photos that are perfect for blend-on-white techniques.
Then watch over my shoulder as I teach you step-by-step how to apply the magic of blend modes on these special photos. (It’s easier than you think and involves a seldom used blend mode.)
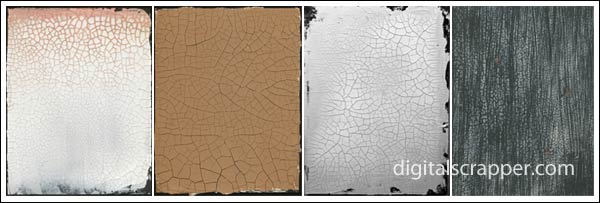
Module 3: All Cracked Up
In real life, cracks and crackle usually mean one thing—age (think antique glazed porcelain), but in blending, they’re the bomb! I LOVE the effects I get from cracks and crackle, and so will you after you see this technique in action!
Soon you’ll be adding a bit of wear and tear on your artistic photos or using them to make a bold statement. And of course they’re perfect for anything vintage.
I have some amazing crack and crackle textures for you in this module. Some I created myself and others are from a master crackle creator (used by permission).
Module 4: The Color Wild Card
Color introduces a whole new (exciting) dimension to blending. Use color to control the mood of your digital blends, and find out which colors have a magical effect on your photos. Also learn how to minimize or remove the effect of color when it gets in the way of the look you want.
We’ll have fun experimenting with color in class, but if you’re short on time, you can use my cheat sheet to quickly get the super cool look you want.
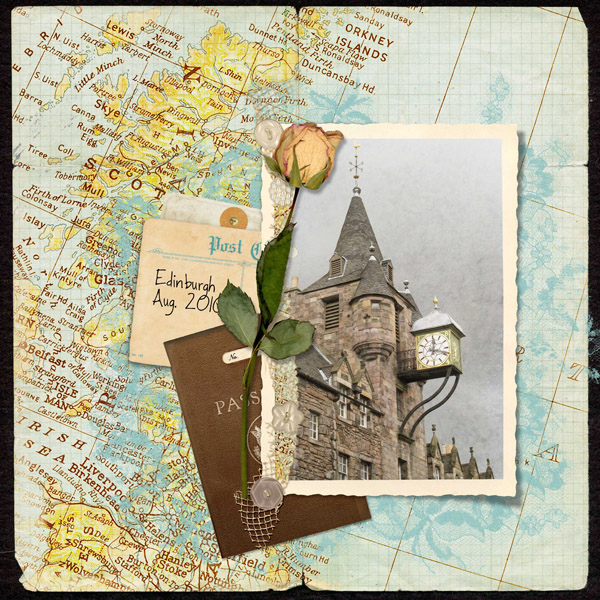
Module 5: The Scrapper Factor
As a digital scrapbooker, you already have a blending gold mine at your fingertips. Isn’t it time you learned how to leverage your supply of papers and elements? I’ll show you how to do just that in Module 5. This will open a whole new world of blending possibilities.
I’ll give you plenty of personal examples, and I’ll even throw in my favorite scrapbooking supplies that are terrific for blending.
Module 6: Give It A (Blended) Edge
You’re probably familiar with photo clipping masks where you clip a photo to a shape to give it an interesting edge. (If you’re not familiar with clipping masks, don’t worry, I’ll show you that too.) In Module 6 we’re going to kick this concept up a notch and learn how to quickly create blended edges. That’s right, the blending creates the edges—if you use the right texture.
I’ll start you out with a set of my textures that are perfect for blended edges, but once you understand the concept, you’ll be able to easily create your own, and you’ll wonder why you didn’t think of doing this before. It works like a charm!
Class Members Created…
By Smith:

By FloridaGranny:
Module 7: Texture Hunt
Ready to get in the driver’s seat and have some fun? We’re going on a Texture Hunt! You’ll be amazed at what you can find when you know what to look for. (It’s like finding hidden treasure under your very nose.)
You’ll learn several methods of tweaking your textures to prepare them for blending. Once you understand these concepts, you’ll become a texture producing machine.
And don’t be surprised if your family joins in the fun. Past students tell me that family members become some of their best texture hunters. (It’s true. My husband is one of my best texture detectives!)
PLUS, to get you started, I’m going to share more than 75 great textures created by past students.
Module 8: Texture Explosion
In Module 8 we’ll approach creating textures from an entirely different angle. You’ll learn how to create a customized texture in Photoshop or Photoshop Elements that is perfect for your special photo. (This will greatly expand your artistic options.)
I’ll even show you one very simple way to create a new texture without any extra effort on your part. (I’m all for finding easy ways to do things!)
Module 9: The Filter Connection
In this module we’re going to bring out the big guns and add Photoshop filters into the mix. If you thought your blending looked good before, watch out, baby! You ain’t seen nothin’ yet!
I’ll get you started with my own favorite filter combinations and even supply you with pre-made Photoshop Actions—as in push a button and Presto! it’s done. (Woo Hoo! This is gonna be fun.)
Before

After

[This class] has changed the way I print my photos. Instead of just photographs displayed in my home, they look like works of art. I have gotten many compliments.
June Korte
Burlington, KY
While I did know a little about blending, now I know so much more and I love all the new things I can do. Thank you so much.
Judy H.
Iowa
Module 10: The Big Picture
If all you did was apply your new blending skills on photographs, this class would be worth every penny, but I want to give you an even greater vision for blended art. So, in our final module, I’ll demonstrate practical and creative ways you can apply these techniques on your digital projects.
For many of you, this lesson will be like turning on a light bulb, where you suddenly see the big picture of how versatile and practical blend modes really are.
Class Members Created…
By cheerio54:
by BeckB:
Bonus Video!
You’re going to love my bonus video where I interview Shirley Lewerenz (known as slewerenz in our gallery). She’s going to talk about her signature pages where she takes a great photo and turns it into a magical page using blend modes and other techniques.

What Can I Expect by the End of Class?
By the end of the 10 learning modules, I guarantee that you’ll be confidently creating blend mode art to be proud of.
You’ll feel in charge every step of the way, from taking photos that work great for blending to putting all the elements of color, texture, and technique together to create unique and beautiful masterpieces!
Here’s MORE of My Students’ Work!
I love bragging about my students! Click HERE or on the image below to take a look at these great before and after photos and see what’s possible when you understand how to make the most of blend modes.
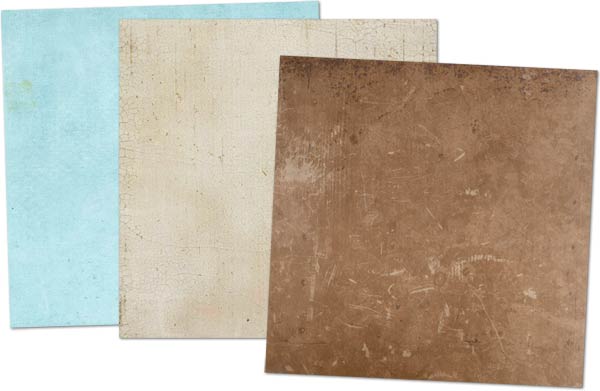
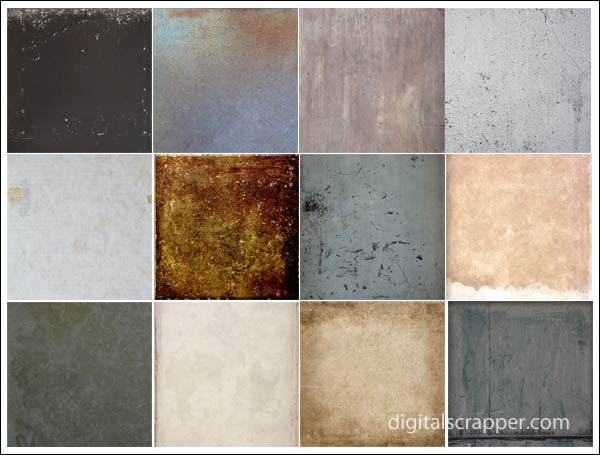
Over 300 Textures Included!
This class includes over 300 downloadable textures, papers, elements, designs, and crackle that you can use to blend with your photos and scrapbook pages. (These alone would be worth the price of the class!)
- Over 220 textures of metal, fabric, grunge, paper, scratches, and more!
- 15 designs to use for blending
- 70 awesome crackle textures that create amazing blends (used by permission from a master crackle creator)
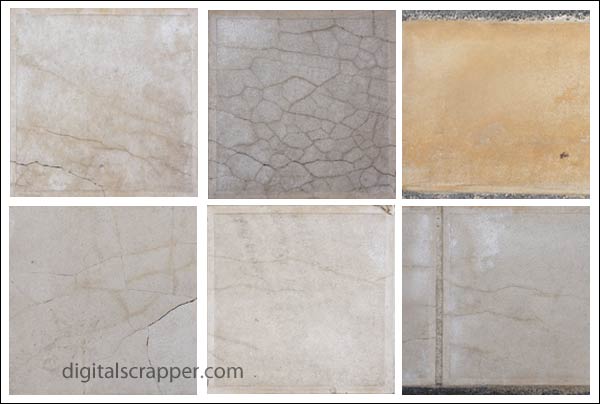
- My personal versatile Monaco tile collection (photographed on location in Monaco)
- Some amazing textures created by past students. (You’ll be creating textures like these soon!)


Joan Storm
Colleyville, TX
June Ireland
Seattle, WA
Nancy Peralta
Buena Park, CA
- More than 45 papers and elements that are ideal for blending (from prior Premier and class kits, so you may have some of these, but this saves you from having to search for ideal blending papers and elements yourself).
Before
After
Maggi Fleming
Hawaii
Joan Hagan
Williamsburg, VA
Are You Ready to Sky Rocket Your Creativity?
Here’s what you need to know:
- The lessons are pre-recorded and available for you to access at any time convenient for you!
- All class materials (videos, manuals, textures, etc.) are downloadable.
- View the videos on any computer, tablet, or cell phone that has internet.
- You have “Forever Access” to the classroom materials, so no need to worry about a computer crash or accidentally losing something.
- You’ll have personal access to me by email if you get stuck—so you can start the class with confidence!
- Mac or Windows? Both!
- Photoshop or Photoshop Elements? Both! (Some knowledge of how to use your program is helpful.)
Before

After
You Have Forever Access
If you have a busy schedule, you don’t have to worry! Remember, you have “Forever Access” to all classes at Digital Scrapper. That means you can go online at any time to view or download the video lessons and step-by-step manuals. And they’ll still be there if you ever (God forbid) have a computer crash.
If you’re on the go and have a few minutes, you can watch the videos on any smart phone or tablet that has access to internet.
Kim U.
Kansas City, Kansas
Diane
Grand Junction
How Much Does The Class Cost?
This class is only $97.00 with Forever Access to the classroom.
Give Me Instant Access!

I’m looking forward to seeing you in class!

Linda Sattgast
Adobe’s Scrapbooking Expert
P.S. This class is your chance to break free from “just pictures” and become a real Photoshop artist. Sign me up!
Peggy Wilmington
Delaware